项目要用websocket实现一个前后端实时通信的功能,做完之后感触颇多,写个博客回顾下整个历程,也希望能给后面的同志有点帮助。
百度网盘示例源码:链接:https://pan.baidu.com/s/1Gi3qRyLO-lTnkVn4MqGIJA 密码:4ovr
我使用springmvc的websocket组件,官网地址:点击打开链接
示例内容:用户登陆之后往设置session设置登陆名,之后跳转到发送消息页面,加载页面时创建websocket连接,这时,springmvc拦截器拦截到websocket请求,把session中登陆名保存到attributes中,这个值会映射到WebSocketSession里,从而在SpringWebSocketHandler类中使用, 这部分看不懂没关联,结合下面的代码来看就懂了。
步骤一:添加maven依赖,注意两点问题
1、spring的websocket依赖容器支持,我选用的是tomcat7.077,tomcat7以下是不支持websocket的
2、javax-servlet-api和java-websocket-api两个包都限定了<scope>provided</scope>因为这两个包tomcat容器已经带了,provided表示编译时使用,打包不会包含在war包里,如不知道重启启动会报错。
<groupId>javax.servlet</groupId>
<artifactId>javax.servlet-api</artifactId>
<groupId>org.springframework</groupId>
<artifactId>spring-webmvc</artifactId>
<version>4.1.5.RELEASE</version>
<artifactId>jstl</artifactId>
<groupId>taglibs</groupId>
<artifactId>standard</artifactId>
<!-- spring websocket -->
<groupId>org.springframework</groupId>
<artifactId>spring-messaging</artifactId>
<version>4.1.7.RELEASE</version>
<groupId>org.springframework</groupId>
<artifactId>spring-websocket</artifactId>
<version>4.1.7.RELEASE</version>
<groupId>javax.websocket</groupId>
<artifactId>javax.websocket-api</artifactId>
步骤二:编辑SpringWebSocketConfig,根据spring文档,编写websocketConfig,这里可参看文档,xml配置和使用注解两种方式,我选择注解方式
registerWebSocketHandlers:这个方法是向spring容器注册一个handler地址,我把他理解成requestMapping
addInterceptors:拦截器,当建立websocket连接的时候,我们可以通过继承spring的HttpSessionHandshakeInterceptor来搞事情。
setAllowedOrigins:跨域设置,*表示所有域名都可以,不限制, 域包括ip:port, 指定*可以是任意的域名,不加的话默认localhost+本服务端口
withSockJS: 这个是应对浏览器不支持websocket协议的时候降级为轮询的处理。
public class SpringWebSocketConfig implements WebSocketConfigurer {
public void registerWebSocketHandlers(WebSocketHandlerRegistry registry) {
registry.addHandler(webSocketHandler(),"/websocket/socketServer")
.addInterceptors(new SpringWebSocketHandlerInterceptor()).setAllowedOrigins("*");
registry.addHandler(webSocketHandler(), "/sockjs/socketServer").setAllowedOrigins("http://localhost:28180")
.addInterceptors(new SpringWebSocketHandlerInterceptor()).withSockJS();
public TextWebSocketHandler webSocketHandler(){
return new SpringWebSocketHandler();
步骤三:编写SpringWebSocketHandlerInterceptor
这个是创建websocket连接是的拦截器,记录建立连接的用户的session以便根据不同session来通信
public class SpringWebSocketHandlerInterceptor extends HttpSessionHandshakeInterceptor {
public boolean beforeHandshake(ServerHttpRequest request, ServerHttpResponse response, WebSocketHandler wsHandler,
Map<String, Object> attributes) throws Exception {
System.out.println("Before Handshake");
if (request instanceof ServletServerHttpRequest) {
ServletServerHttpRequest servletRequest = (ServletServerHttpRequest) request;
HttpSession session = servletRequest.getServletRequest().getSession(false);
//使用userName区分WebSocketHandler,以便定向发送消息
String userName = (String) session.getAttribute("SESSION_USERNAME"); //一般直接保存user实体
attributes.put("WEBSOCKET_USERID",userName);
return super.beforeHandshake(request, response, wsHandler, attributes);
public void afterHandshake(ServerHttpRequest request, ServerHttpResponse response, WebSocketHandler wsHandler,
super.afterHandshake(request, response, wsHandler, ex);
步骤四:编写SpringWebSocketHandler
public class SpringWebSocketHandler extends TextWebSocketHandler {
private static final Map<String, WebSocketSession> users; //Map来存储WebSocketSession,key用USER_ID 即在线用户列表
private static final String USER_ID = "WEBSOCKET_USERID"; //对应监听器从的key
users = new HashMap<String, WebSocketSession>();
public SpringWebSocketHandler() {}
public void afterConnectionEstablished(WebSocketSession session) throws Exception {
System.out.println("成功建立websocket连接!");
String userId = (String) session.getAttributes().get(USER_ID);
users.put(userId,session);
System.out.println("当前线上用户数量:"+users.size());
//这块会实现自己业务,比如,当用户登录后,会把离线消息推送给用户
//TextMessage returnMessage = new TextMessage("成功建立socket连接,你将收到的离线");
//session.sendMessage(returnMessage);
public void afterConnectionClosed(WebSocketSession session, CloseStatus closeStatus) throws Exception {
String userId= (String) session.getAttributes().get(USER_ID);
System.out.println("用户"+userId+"已退出!");
System.out.println("剩余在线用户"+users.size());
* js调用websocket.send时候,会调用该方法
protected void handleTextMessage(WebSocketSession session, TextMessage message) throws Exception {
super.handleTextMessage(session, message);
System.out.println("服务器收到消息:"+message);
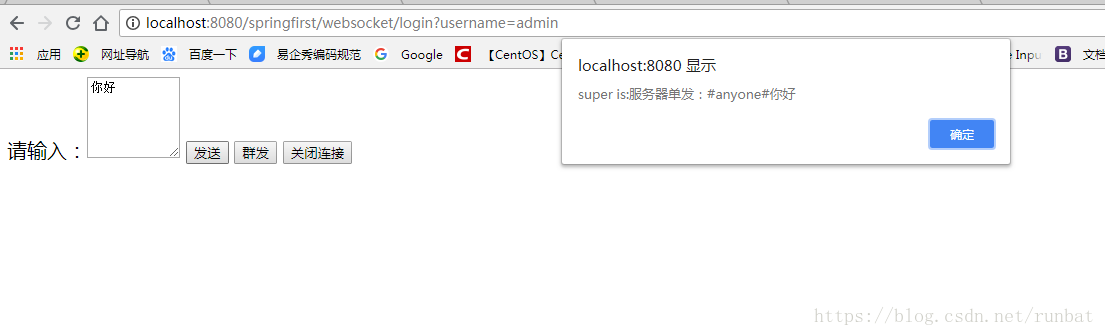
if(message.getPayload().startsWith("#anyone#")){ //单发某人
sendMessageToUser((String)session.getAttributes().get(USER_ID), new TextMessage("服务器单发:" +message.getPayload())) ;
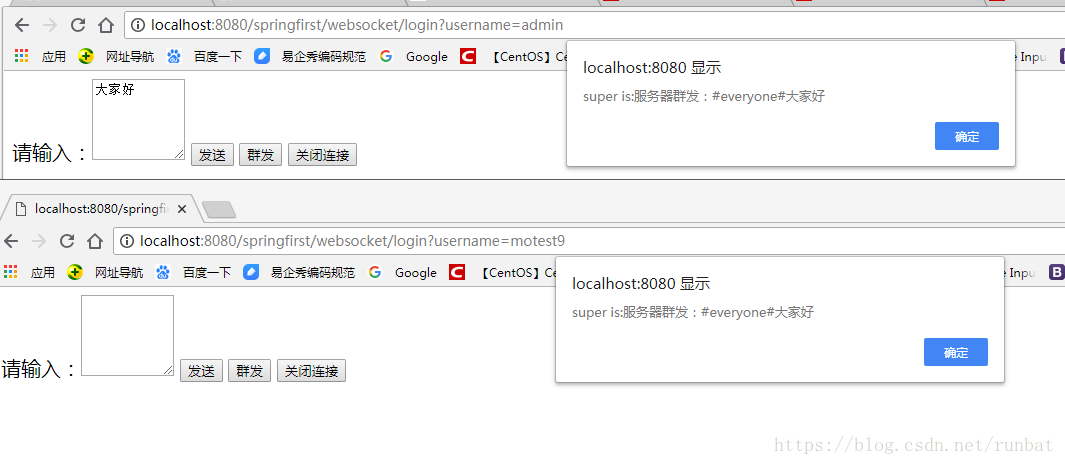
}else if(message.getPayload().startsWith("#everyone#")){
sendMessageToUsers(new TextMessage("服务器群发:" +message.getPayload()));
public void handleTransportError(WebSocketSession session, Throwable exception) throws Exception {
System.out.println("传输出现异常,关闭websocket连接... ");
String userId= (String) session.getAttributes().get(USER_ID);
public boolean supportsPartialMessages() {
public void sendMessageToUser(String userId, TextMessage message) {
for (String id : users.keySet()) {
if (users.get(id).isOpen()) {
users.get(id).sendMessage(message);
} catch (IOException e) {
public void sendMessageToUsers(TextMessage message) {
for (String userId : users.keySet()) {
if (users.get(userId).isOpen()) {
users.get(userId).sendMessage(message);
} catch (IOException e) {
步骤五:配置文件扫描config类 我的SpringWebSocketConfig配置在包com.thunisoft.config下
<context:component-scan base-package="com.thunisoft.ssm.controller,com.thunisoft.config"></context:component-scan>
步骤六:编写springmvc controller
public class WebSocketController {
@Bean//这个注解会从Spring容器拿出Bean
public SpringWebSocketHandler infoHandler() {
return new SpringWebSocketHandler();
@RequestMapping("/websocket/loginPage")
public String loginPage(HttpServletRequest request, HttpServletResponse response) throws Exception {
@RequestMapping("/websocket/login")
public String login(HttpServletRequest request, HttpServletResponse response) throws Exception {
String username = request.getParameter("username");
System.out.println(username+"登录");
HttpSession session = request.getSession(false);
session.setAttribute("SESSION_USERNAME", username); //一般直接保存user实体
@RequestMapping("/websocket/send")
public String send(HttpServletRequest request) {
String username = request.getParameter("username");
infoHandler().sendMessageToUser(username, new TextMessage("你好,测试!!!!"));
@RequestMapping("/websocket/broad")
infoHandler().sendMessageToUsers(new TextMessage("发送一条小Broad"));
System.out.println("群发成功");
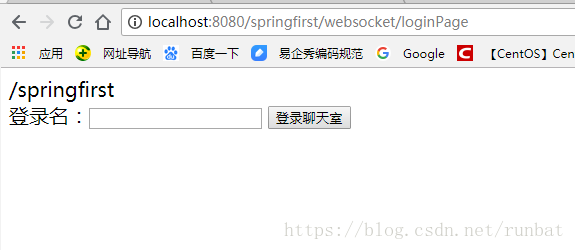
步骤七:编辑登陆jsp
<%@ page language="java" contentType="text/html; charset=UTF-8" pageEncoding="UTF-8" %>
<%@ taglib uri="http://java.sun.com/jsp/jstl/core" prefix="c" %>
<%@ taglib uri="http://java.sun.com/jsp/jstl/fmt" prefix="fmt" %>
<c:set var="ctx" value="${pageContext.request.contextPath}"/>
<meta http-equiv="Content-Type" content="text/html; charset=UTF-8"/>
<title>测试spring websocket</title>
<form action="${ctx}/websocket/login">
登录名:<input type="text" name="username"/>
<input type="submit" value="登录聊天室"/>
步骤八:编写通信页面
<%@ page language="java" contentType="text/html; charset=UTF-8" pageEncoding="UTF-8" %>
<%@ taglib uri="http://java.sun.com/jsp/jstl/core" prefix="c" %>
<%@ taglib uri="http://java.sun.com/jsp/jstl/fmt" prefix="fmt" %>
<c:set var="ctx" value="${pageContext.request.contextPath}"/>
<meta http-equiv="Content-Type" content="text/html; charset=UTF-8"/>
<link rel="stylesheet" href="/css/style.css"/>
<script type="text/javascript" src="http://cdn.bootcss.com/jquery/3.1.0/jquery.min.js"></script>
<script type="text/javascript" src="http://cdn.bootcss.com/sockjs-client/1.1.1/sockjs.js"></script>
<script type="text/javascript">
if ('WebSocket' in window) {
websocket = new WebSocket("ws://localhost:8080/springfirst/websocket/socketServer");
else if ('MozWebSocket' in window) {
websocket = new MozWebSocket("ws://localhost:8080/springfirst/websocket/socketServer");
websocket = new SockJS("http://localhost:8080/springfirst/sockjs/socketServer");
websocket.onopen = onOpen;
websocket.onmessage = onMessage;
websocket.onerror = onError;
websocket.onclose = onClose;
function onOpen(openEvt) {
function onMessage(evt) {
alert("super is:" + evt.data);
alert(websocket.readyState + ":" + websocket.OPEN);
if (websocket.readyState == websocket.OPEN) {
var msg = document.getElementById("inputMsg").value;
websocket.send("#anyone#"+msg);//调用后台handleTextMessage方法
if (websocket.readyState == websocket.OPEN) {
var msg = document.getElementById("inputMsg").value;
websocket.send("#everyone#"+msg);//调用后台handleTextMessage方法
function websocketClose() {
请输入:<textarea rows="5" cols="10" id="inputMsg" name="inputMsg"></textarea>
<button οnclick="doSendUser();">发送</button>
<button οnclick="doSendUsers();">群发</button>
<button οnclick="websocketClose();">关闭连接</button>
演示效果图
登陆:
单发:
群发:
后续配合nginx发布,在nginx代理的情况下需要配置,这个示例项目,我的跟目录是/springfirst ,springfirst是我的项目名,实际项目发布的时候是隐藏项目名的,所以配置/就可以。
proxy_http_version 1.1;
proxy_set_header Upgrade $http_upgrade;
proxy_set_header Connection "upgrade";
server_name max.eqshow.cnn;
#access_log logs/host.access.log main;
proxy_pass http://websocket;
proxy_set_header Host $host;
proxy_set_header X-Real-IP $remote_addr;
proxy_set_header X-Forwarded-For $proxy_add_x_forwarded_for;
proxy_set_header Upgrade $http_upgrade;
proxy_set_header Connection "upgrade";
总结: 做完之后感觉整个过程并不复杂,单其实经历了好几天,从最初的不知道什么是websocket,到后来不知道nginx配置出问题,从不知道到知道,其实遇到了很多问题。比如,不知道websocket需要容器和浏览器的支持,不知道跨域需要设置setAllowedOrigins("*"),demo写好怎么融入到项目中也遇到了很多问题。但这一切在有结果的时候都豁然开朗。同时也了解了器用分析法,先了解基本用法,写个demo,然后研究其原理。到目前为止也是浅薄的是了解而已,后面遇到问题在继续更新吧。
本文示例参考:https://blog.csdn.net/zmx729618/article/details/78584633
springmvc websocket:点击打开链接
http://www.runoob.com:点击打开链接